-
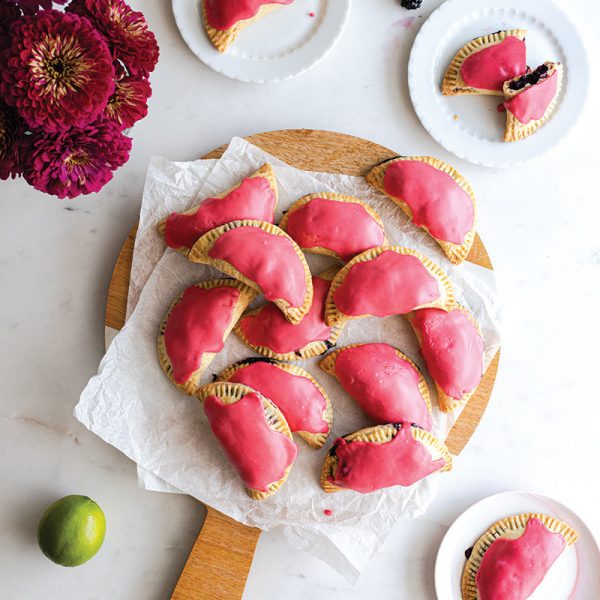
Serving Size
8
-
Total Time
2 hours
Ingredients
Blackberry Lime Hand Pies:
1 Basic All Butter Pie Dough disks (recipe makes 2 disks but you only need 1 for this recipe)
1 1/2 pints fresh blackberries (about 3 cups), rinsed
1/2 cup granulated sugar
1 medium lime, rinsed, zested, and juiced
2 tablespoons tapioca flour or cornstarch
Blackberry Lime Glaze:
1 1/2 cups powdered sugar, sifted
1-2 tablespoons reserved lime juice
1-2 tablespoons reserved blackberry juice
Directions
-
Remove Basic All Butter Pie Dough disk from refrigerator and set on the counter at room temperature to soften while you prepare the filling.
-
Rinse and drain blackberries. Place in a large bowl, top with sugar, the zest of the lime and 1 tablespoon of lime juice. Gently stir together to combine. Allow to sit for 15 minutes so the juices begin to release from the fruit.
-
Use a spatula to lightly mash the blackberries, then pour through a fine mesh sieve over a bowl to strain the juices. Set the juices aside and transfer the blackberries back to the original mixing bowl. Add the tapioca flour and gently mix until fully absorbed into the fruit.
-
Once the dough has softened just enough to leave a thumb print indention in the top, it’s ready to roll. On a lightly floured surface, roll the first dough disk to a ?” - ¼” thickness. Using a 5" round cookie cutter or other round template and a sharp knife, cut circles from the dough.
-
Gather the dough scraps together, form a disk to re-roll, then cut more dough rounds from the scraps. *If the dough scraps start to get too warm and sticky, shape into a disk, wrap and place back in the fridge to chill for a few minutes before rolling out again.
-
Spoon about 2 tablespoons of strained blackberry filling onto one half of each round of dough. Careful not to transfer a bunch of juice onto the dough to help minimize leaks and soggy bottoms.
-
Lightly brush a small amount of cold water around the edges of the dough rounds, then lift and fold the unfilled half over the top, creating a half-moon shape. Gently seal the edges by pressing together. Then create a decorative crimp by pressing the edges of the dough together with the back of a fork.
-
Set the hand pies on a lined baking sheet, and place in the freezer to chill for at least 30 – 60 minutes until firm. *Freezing the hand pies first helps them keep their structure as they bake.
-
Repeat the process with remaining dough rounds. Then repeat the entire process with the second dough disk.
-
Preheat oven to 400°F. Remove the chilled hand pies from the freezer. Cut three small slits in the top of each hand pie for vents.
-
Bake until the hand pies are a warm golden brown, about 22 - 25 minutes, rotating the pans halfway through.
-
Remove the pies from the oven. Allow to cool a few minutes on the pans, then transfer to a cooling rack.
-
Make the blackberry lime glaze. Sift the powdered sugar into a medium bowl. Adding 1 tablespoon at a time, whisk in 1-2 tablespoons of reserved lime juice and 1-2 tablespoons of reserved blackberry juice, until the mixture is smooth and runs off the whisk like molasses.
-
Spoon about 1 tablespoon of glaze onto each hand pie, smoothing the glaze to the crimped edges with the back of the spoon or a small spatula.
-
Allow the glaze to set before serving. For additional recipe notes and pro tips, visit the original recipe here.
More Recipes
browse all recipes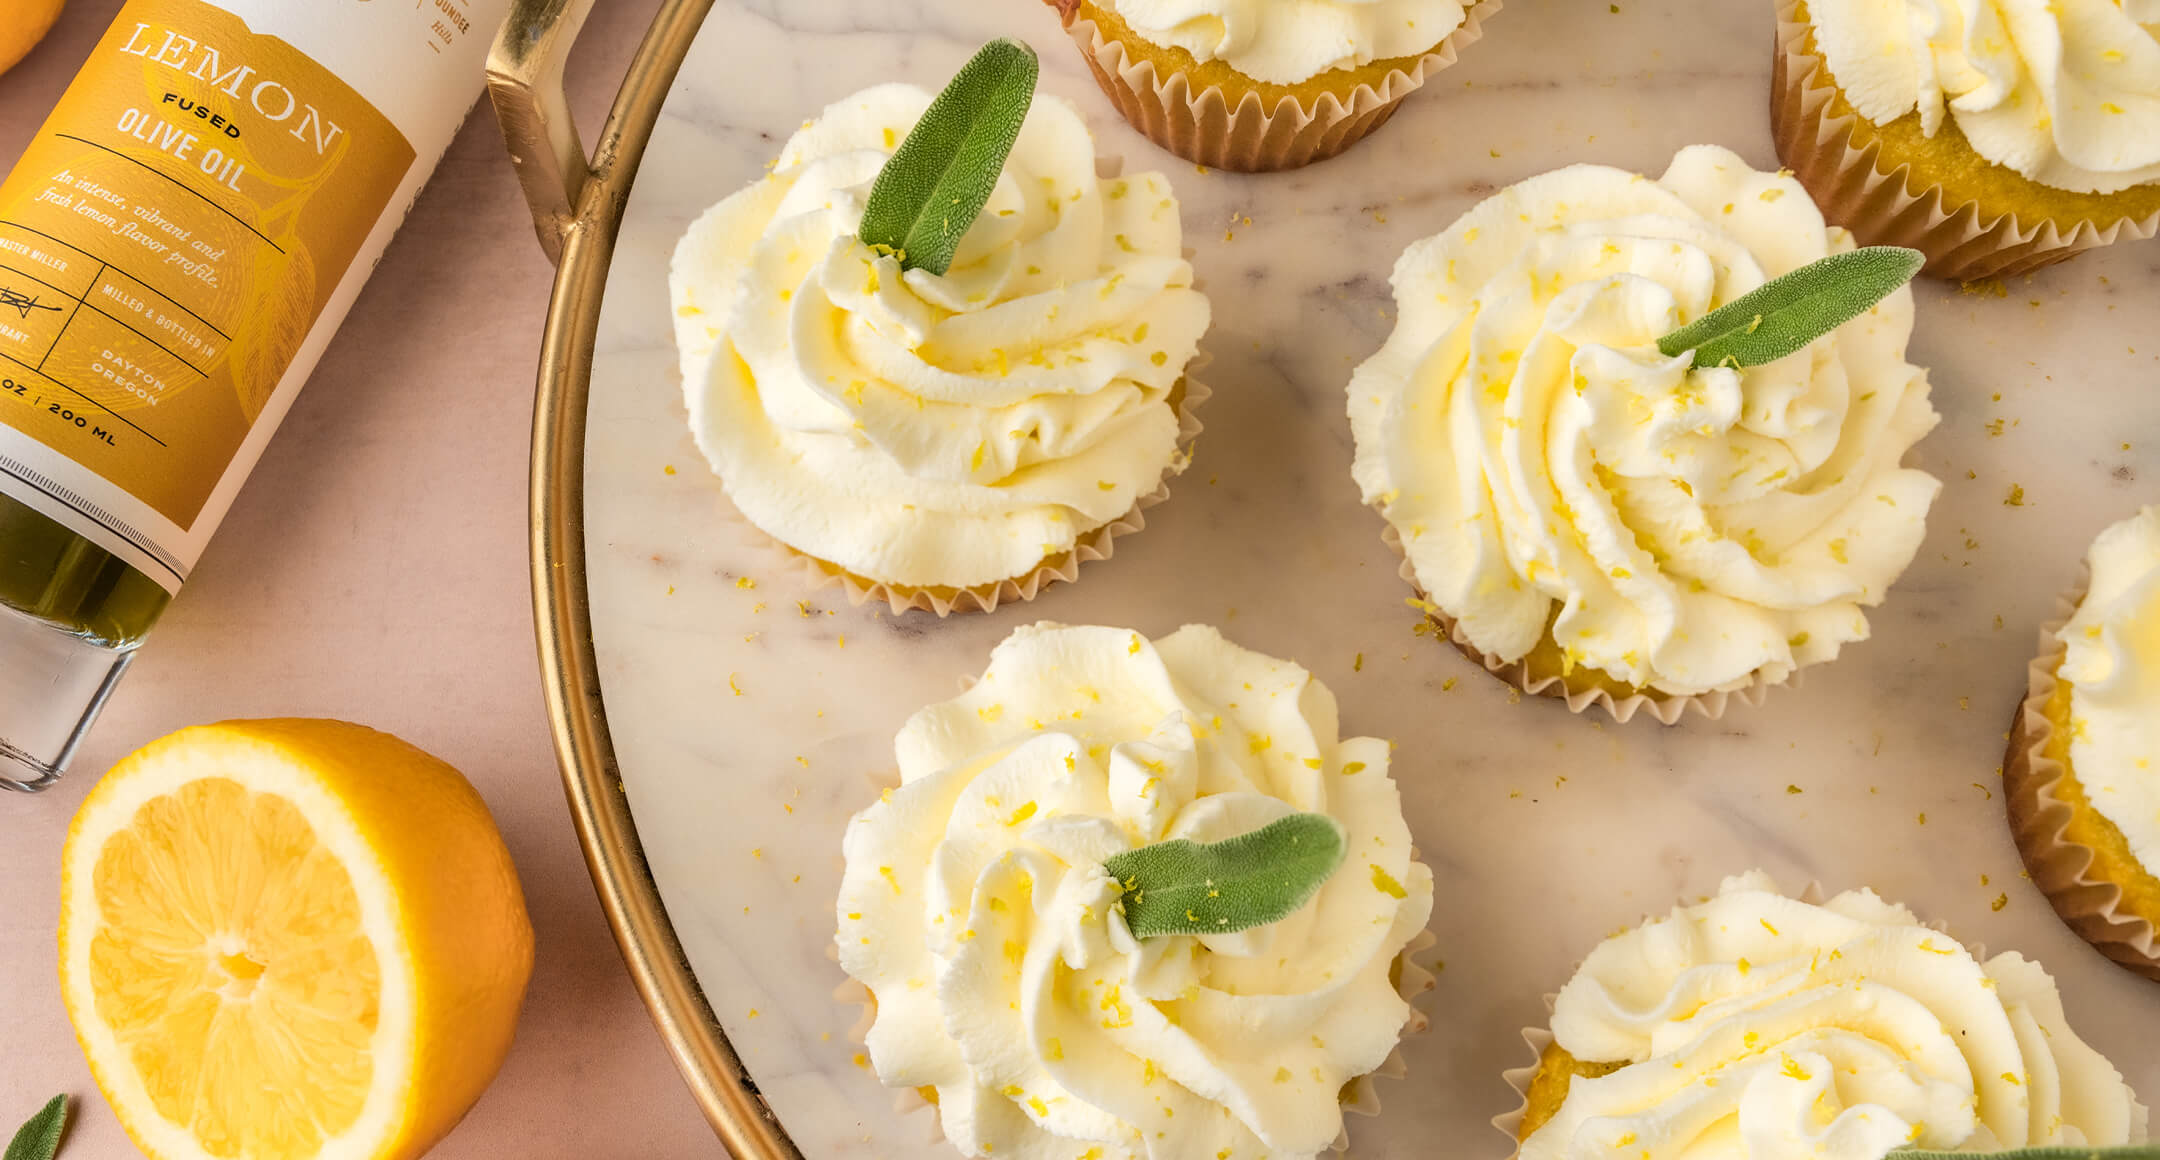
Lemon Olive Oil Cupcakes
A lemon olive oil cupcake recipe made with Durant Lemon-Fused Olive Oil and lemon zest with a light, airy whipped cream frosting.
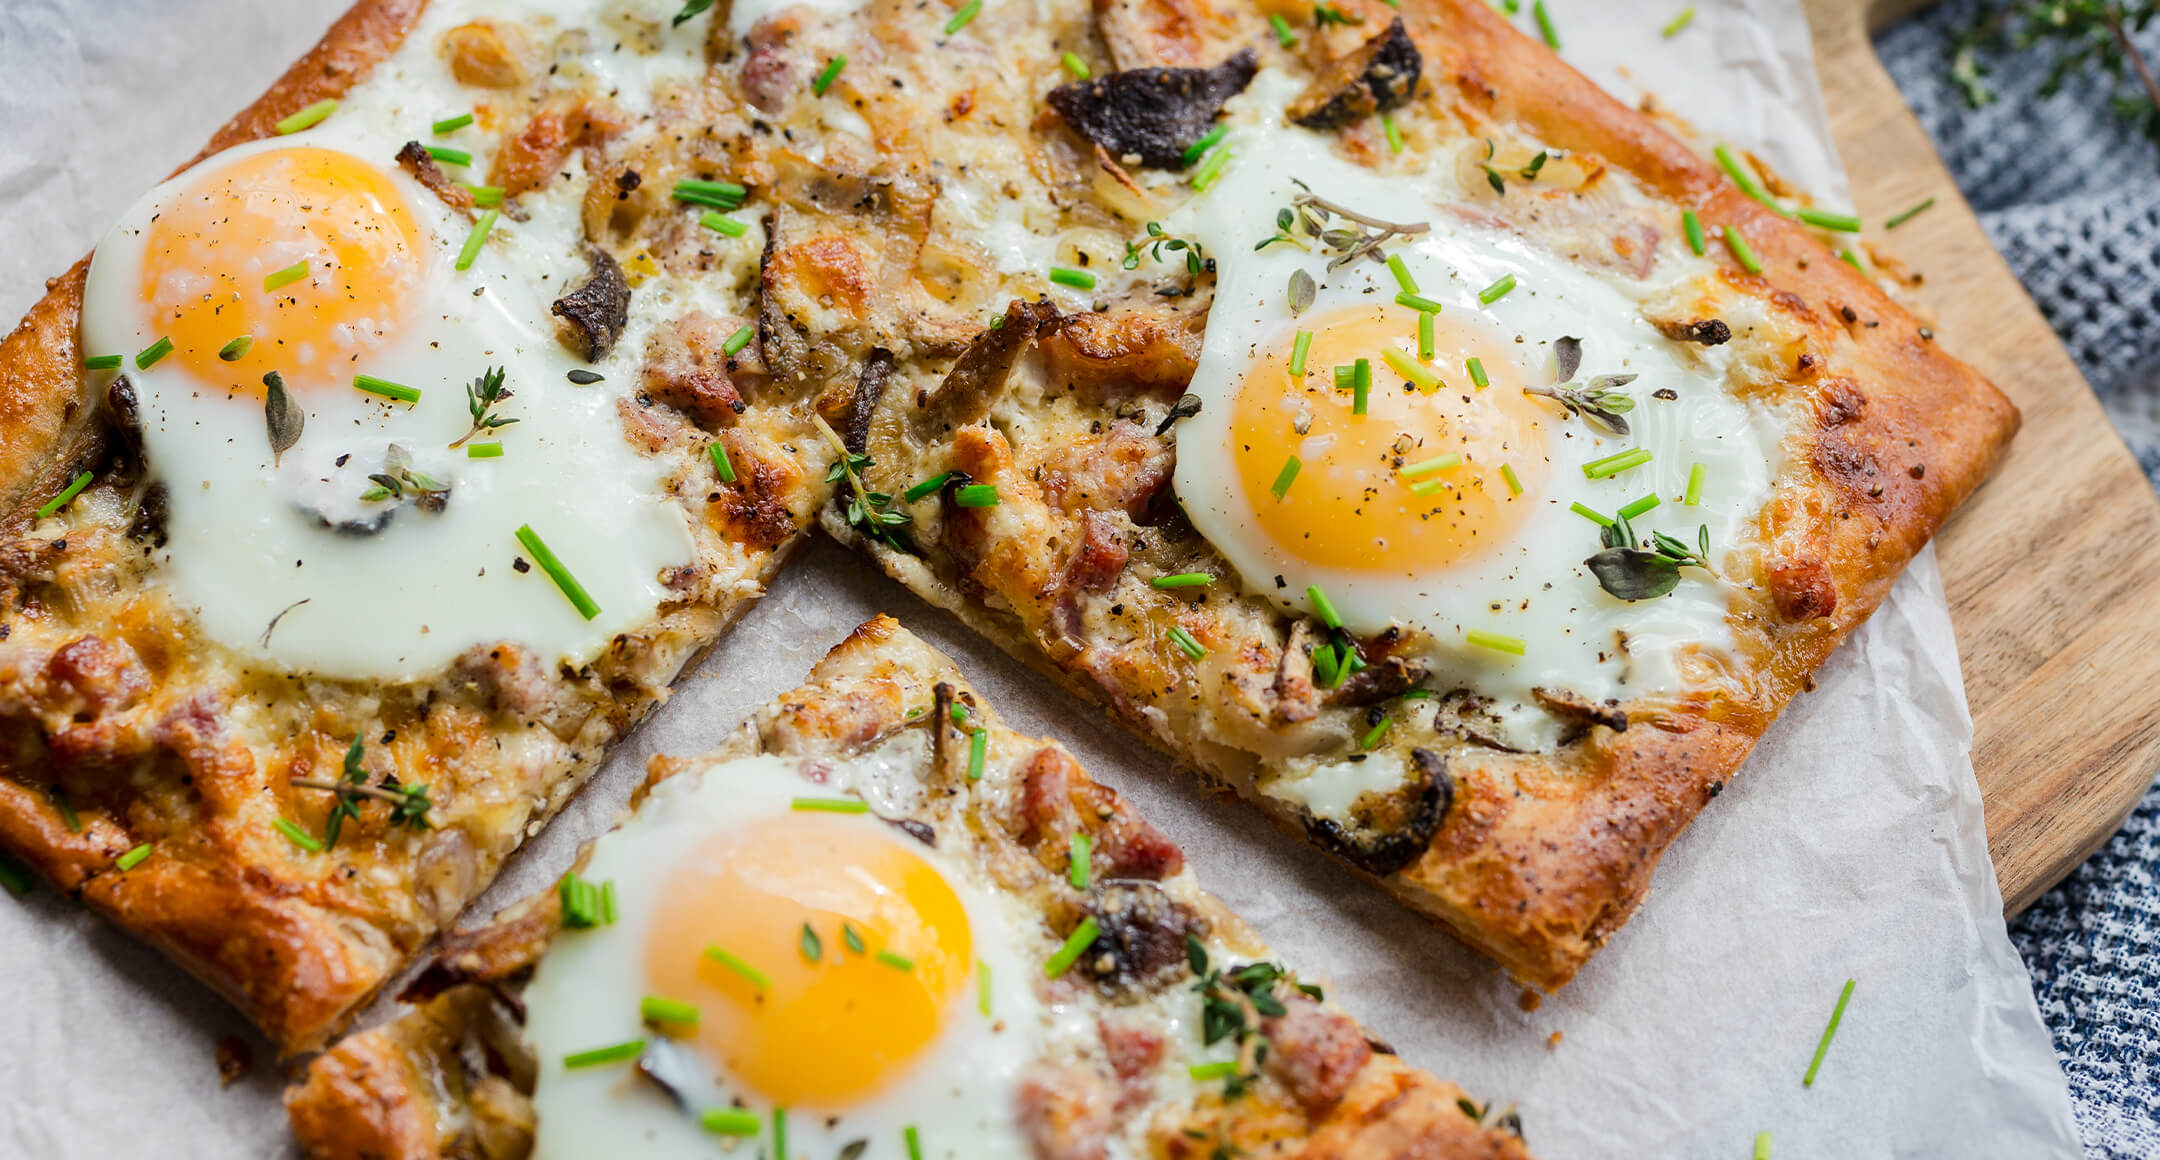
Savory Breakfast Tarts
Savory puff pastry tarts topped with sautéed mushrooms and ham with gruyere cheese and sunny-side-up eggs.
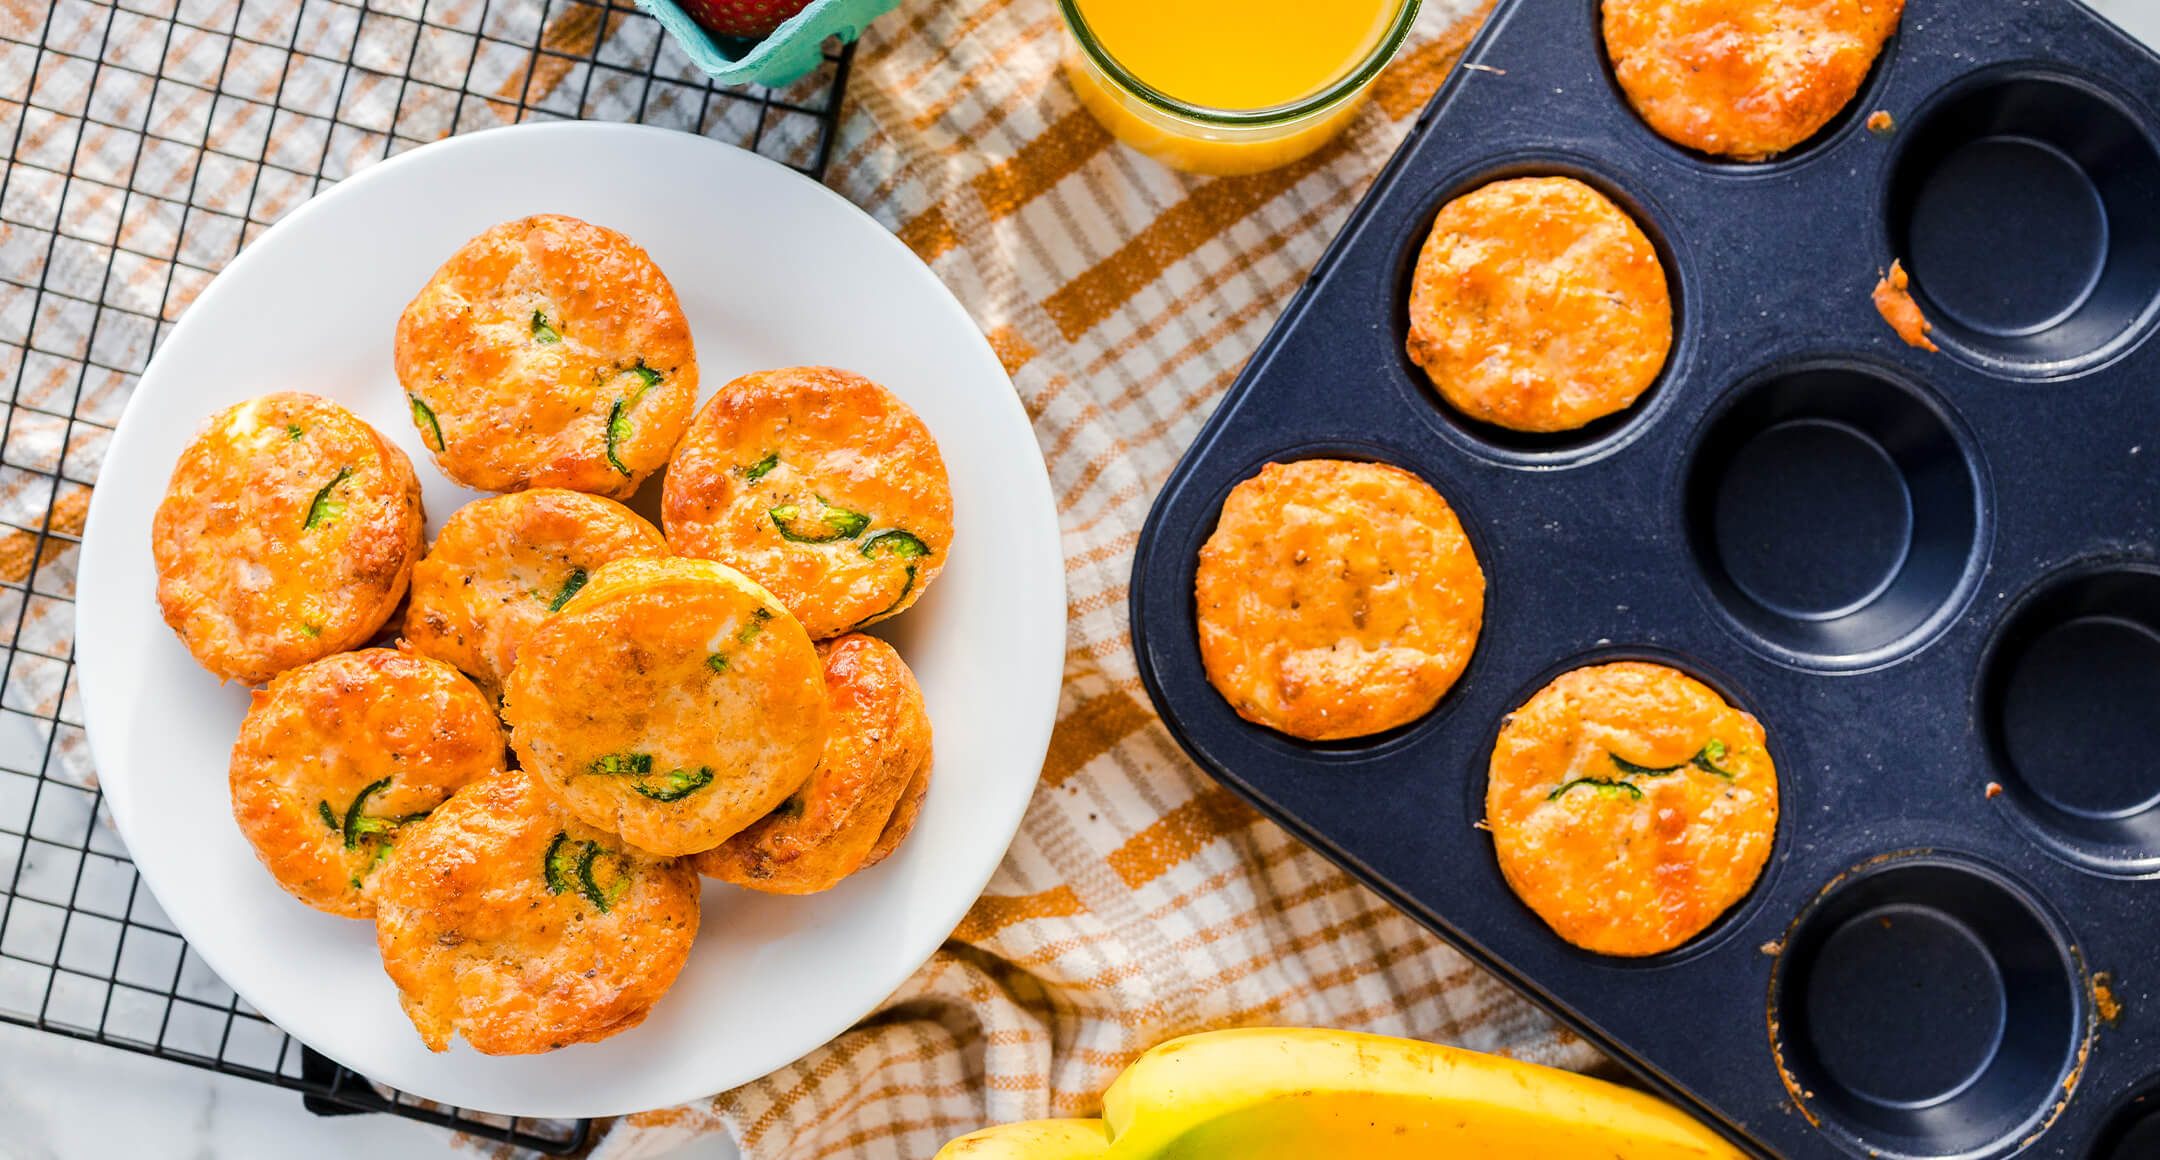
Protein Breakfast Bites
A protein breakfast bite recipe featuring eggs, pancake mix, cheese, and a cooked protein of choice.